In recent years, a new type of event has been very successful – DIY workshops (where DIY stands for “Do It Yourself “). Propelled by social media where new DIY tutorials accounts pop-up every day, teaching everything from how to knit a scarf to redecorating your living room or how to make your own candles or jewellery… DIY workshops are very popular.
Concretely, the DIY trend is the art of tinkering, recycling, making everyday objects yourself. More than an activity, it is a way of life. Sewing, home improvement, customising your clothes, making cosmetics … there is something for everyone!
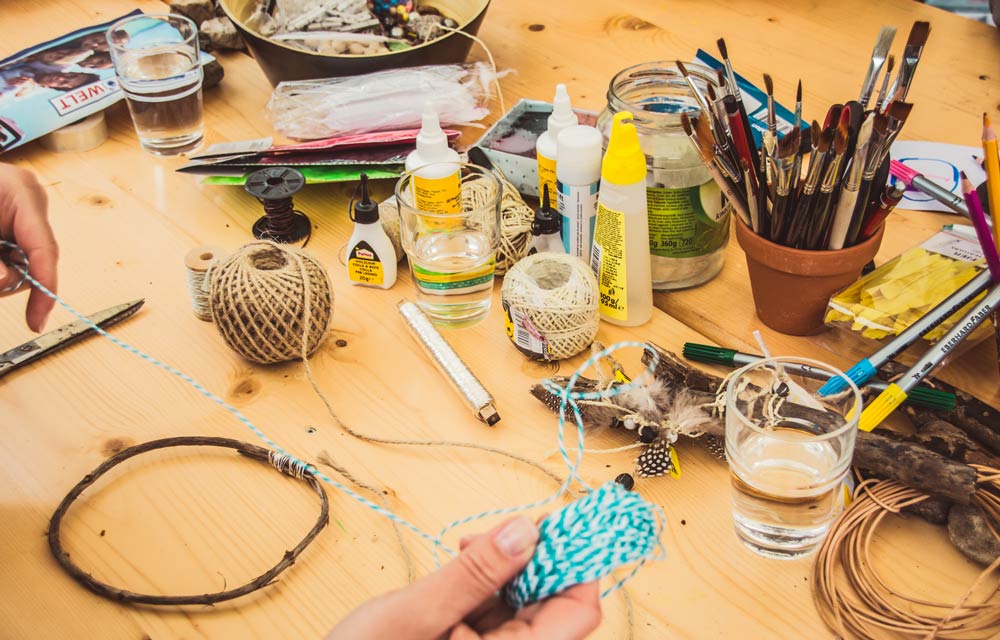
What does a DIY workshop look like?
There are three types of workshops: at the creator’s, at the participants’, or in partnership with stores or companies. It’s up to you to define yours in line with your preferences.
Your workshops can attract individuals, businesses or event agencies. Each workshop is different, depending on the type of customer, the organisation, the duration and the recurrence.
Organised for small groups (from 4 to 15 people, depending on the duration of your workshop and its recurrence) these workshops are the opportunity to really exchange advice on everyday activities. A theory part generally come before the practice. It usually concerns the materials, the techniques used, the possible uses of the tools and the object in question. The “students” can (most often) leave the workshop with their completed project in hand.
How to organise a DIY workshop
DIY workshops are the perfect opportunity for creatives and enthusiasts to promote their products, earn some extra money, share a passion or friendly moments with interested participants. Many reasons can motivate you to organise your own workshops.
1 – Choice of venue
Above all, it is essential to find a location that is suited to the number of students you want to host, the duration of your workshop and the equipment you need to complete the projects. You will not have the same logistical requirements if you are organising for a creative person or on your own behalf, for a local government or a business.
You may decide to organise your workshops at home, in which case you will need professional insurance. This solution’s main advantage is that you will not need to move any equipment. Nevertheless, it requires a large space to dedicate to this activity.
Some workshop organisers prefer to plan their workshops in their shop or that of someone they know. All the equipment is already there and it is the opportunity to promote their creations and inspire participants by welcoming them in the universe of the shop. And perhaps sell at the same time.
If you do not have access to either of these options, you can contact the local tourism office or town hall. Many public premises have spaces for this type of activity. Be careful, however, and make sure that you will be able to set-up all the necessary equipment and that the calendars will not be too restrictive.
Finally, you could decide to organise workshops in private homes, in places of life (co-working space, café, restaurant, …) or in companies. Some HR departments and employee representatives make this type of activity available to their employees for team-building moments or to current and prospective clients. This solution saves you from having to hire a venue, but it can be more complicated to plan and organise the space according to your material needs.
2 – What to ask yourself when you organise your workshop
Once you have picked your venue, there is a number of questions that you should ask yourself before planning any workshop.
Who is your target audience? Adults or children, businesses or individuals. You will adjust your communication strategy about the workshop, its content and its price depending on the target. To decide on the price, analyse what others do around you, and opt for a single price per workshop that includes the equipment needed, the insurance and the value of your service.
How many people can you accommodate? The answer to this question is a compromise between comfort and profitability. It will depend on the equipment needed, whether you are staying in one place or not, whether you need to hire a venue or not, etc. You will need a minimum of participants. However, keep in mind that the setting should be user-friendly, make it an opportunity to exchange and allow time for participants to carry out their projects to give them a better experience.
What equipment and how much space do you need? Prepare a budget including your fixed costs (your equipment, your tools) and variable costs (non-reusable materials to be made available to each student), the latter will help you set your rates.
When will your workshop take place? If your target is made up of working people, you will have to set your workshop at the end of the day or in the early evening. For a younger audience, favour weekends and Wednesdays or holidays. If you work for companies, you will have to adapt to their schedule.
3 – Planning your workshop
Plan your different workshops and their programmes well in advance. Your workshop should be prepared as a course. Split it into several parts:
- one part introducing the techniques used (history and origins, description of materials and tools, presentation of techniques and uses …),
- one part of Q&A and discussions,
- the practical part, i.e. making the object. And finally collecting feedback (e.g. make use of the object’s cooking time to discuss around a drink about any difficulties encountered, participants’ feedback on the course etc.)
Each workshop should be dedicated to a single object to maximise the equipment needed and the attention of the participants. Preparing ahead of time is essential for the workshop to run smoothly. Remember to organise a first “test workshop“. Keep in mind that some participants may need more support and ask a lot of questions, so plan a buffer in your schedule.
It is advisable to provide visual support with images and bullet points summaries of each stage of the preparation on which participants can take notes to bring home. Also, to make the experience both useful and enjoyable, you can provide food and drinks.
How to get people to sign up to your DIY workshop?
Creatives are advised to write a blog or create a website on which they can share their creations, techniques and activities. Combining your blog with a regular presence on social media is one way to greatly increase your visibility.
If you have a Facebook page (we strongly recommend it), you should create events for each session. These communication channels will allow you to integrate a ticketing system and thus link your creative activity to your workshops.
To reach more potential customers, register with your local tourism office and get in touch with your town hall. You can also create flyers with useful information about your workshop. Choose colours and images that match your universe. Depending on your target audience, distribute them in shops near your workshop, in day-care centres, schools, DIY stores, etc.
The local press can also serve as a relay. Write a press release talking about the story, the purpose and the specifics of your workshop. Introduce yourself and your creations. If you can, you should add photos or a video … make it as attractive as possible, you could get an interview!
To retain your participants, consider having them fill out a form at the time of registration that will allow you to retrieve their email address and communicate about future workshops that you plan to organise or to forward the visual supports used during the workshop.
Ready to organise your own DIY workshop? Start now with Weezevent: